
Guide/October 13, 2022
How to Create a Restricted User in PostgreSQL to Limit Data Access

Debabrata Mondal
Software Engineer

When you connect your database to Dashibase via your database admin credentials, Dashibase can access your entire database so that you can easily build your dashboards.
But if you want to limit what data Dashibase can access, an option is to connect your database to Dashibase with a restricted PostgreSQL user.
Here is an overview of the steps:
- Create a database role with limited access to your database
- Create a database user and assign the role to the user
- Use the user’s credential to connect the database to Dashibase
Then Dashibase will only be able to access whatever the database user can access.
Quick context
PostgreSQL manages database access permissions using the concept of roles. You can add attributes to a role to manage its privileges, then assign the role to a user, whom you use to connect the database.
To help you understand the concept, let’s go through an example of a demo online store. The public schema for our postgres database is shown below:
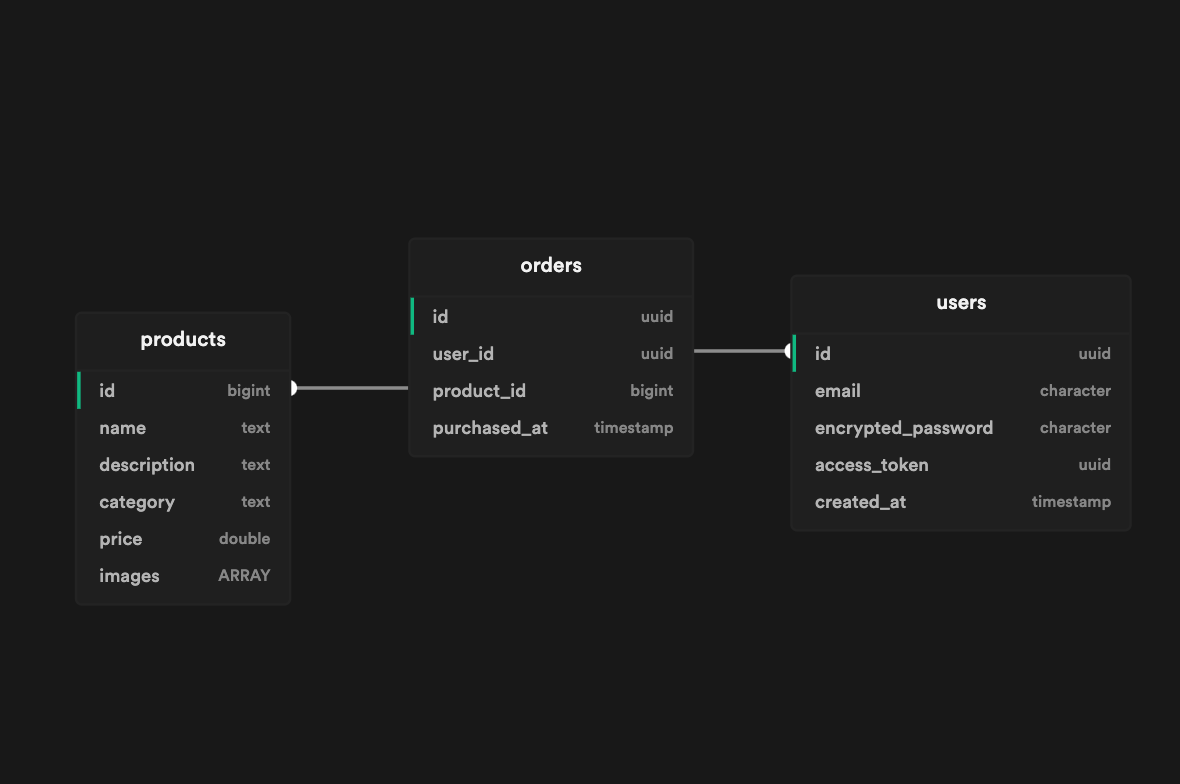
userstable contains account details for usersproductstable contains product information for our online storeorderstable lists all the orders that are executed on the store
We would like to use Dashibase for our business operations. But we do not want to give Dashibase access to the users table because it contains sensitive information.
To do that, we can create a restricted user, who has full access to orders and products but doesn’t have access to the users table. We can then use this user’s credentials to connect the database to Dashibase. This way, Dashibase will not have access to the users table.
Step 1: Create a database role
PostgreSQL provides a lot of flexibility regarding the permissions that we can grant to a role. We will focus on only the ones that we need for this example.
If you are using Supabase, you can run these queries via its SQL editor.
- Create a new role:
CREATE ROLE dashibase_role; - Grant this role permission to connect to our database (named
postgres):GRANT CONNECT ON DATABASE postgres TO dashibase_role; - Give the role usage access to our public schema:
GRANT USAGE ON SCHEMA public TO dashibase_role; - Grant full access to
productsandorderstable:GRANT SELECT, INSERT, UPDATE, DELETEON TABLE products, ordersTO dashibase_role;
Notice the dashibase_role role does not have any access to the users table.
The role should now be configured with the necessary permissions!
Step 2: Create a database user
Now, we will create a database user, dashibase, and give it the dashibase_role:
CREATE USER dashibase WITH PASSWORD 'password';GRANT dashibase_role TO dashibase;We will use this username and password when we connect a data source to Dashibase.
Step 3: Connect your database with Dashibase
Now that we have a restricted user, we can use its credentials to connect with Dashibase.
In Dashibase, go to “Data Sources” via the left sidebar and click on “Connect Data Source” in the upper-right corner.
Enter your database credentials and the username and password you just created. This will ensure that Dashibase only has access to whatever the restricted database user has.
Have fun building your dashboards!
Restricting data access via Dashibase
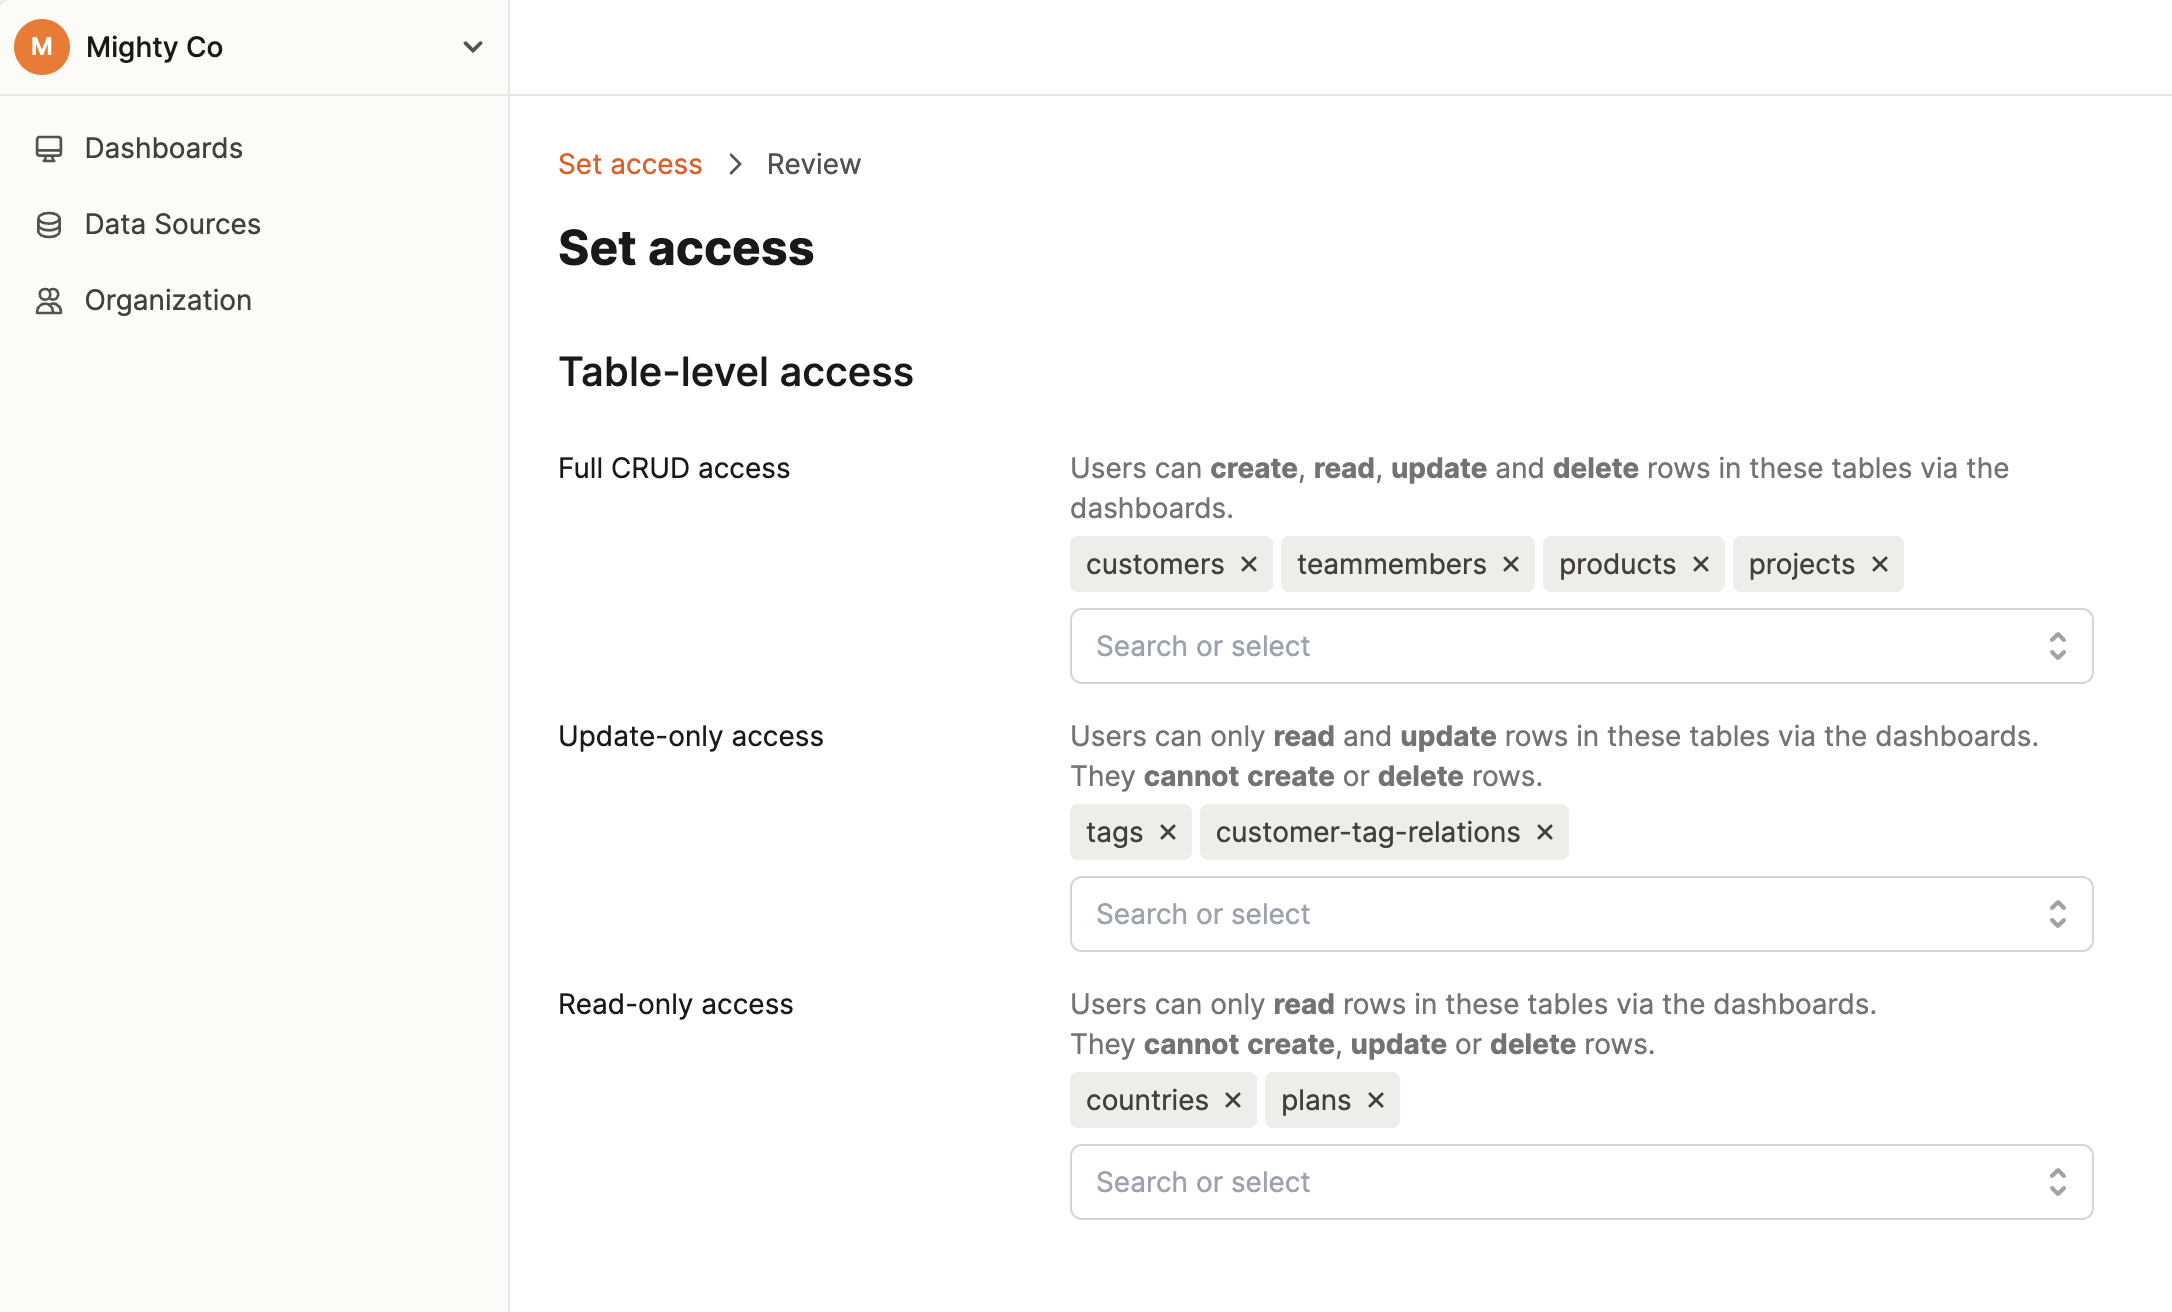
If you don’t mind Dashibase having access to your entire database but don’t want your team members to read and write access to your entire database, you can use Dashibase to set up data access control.
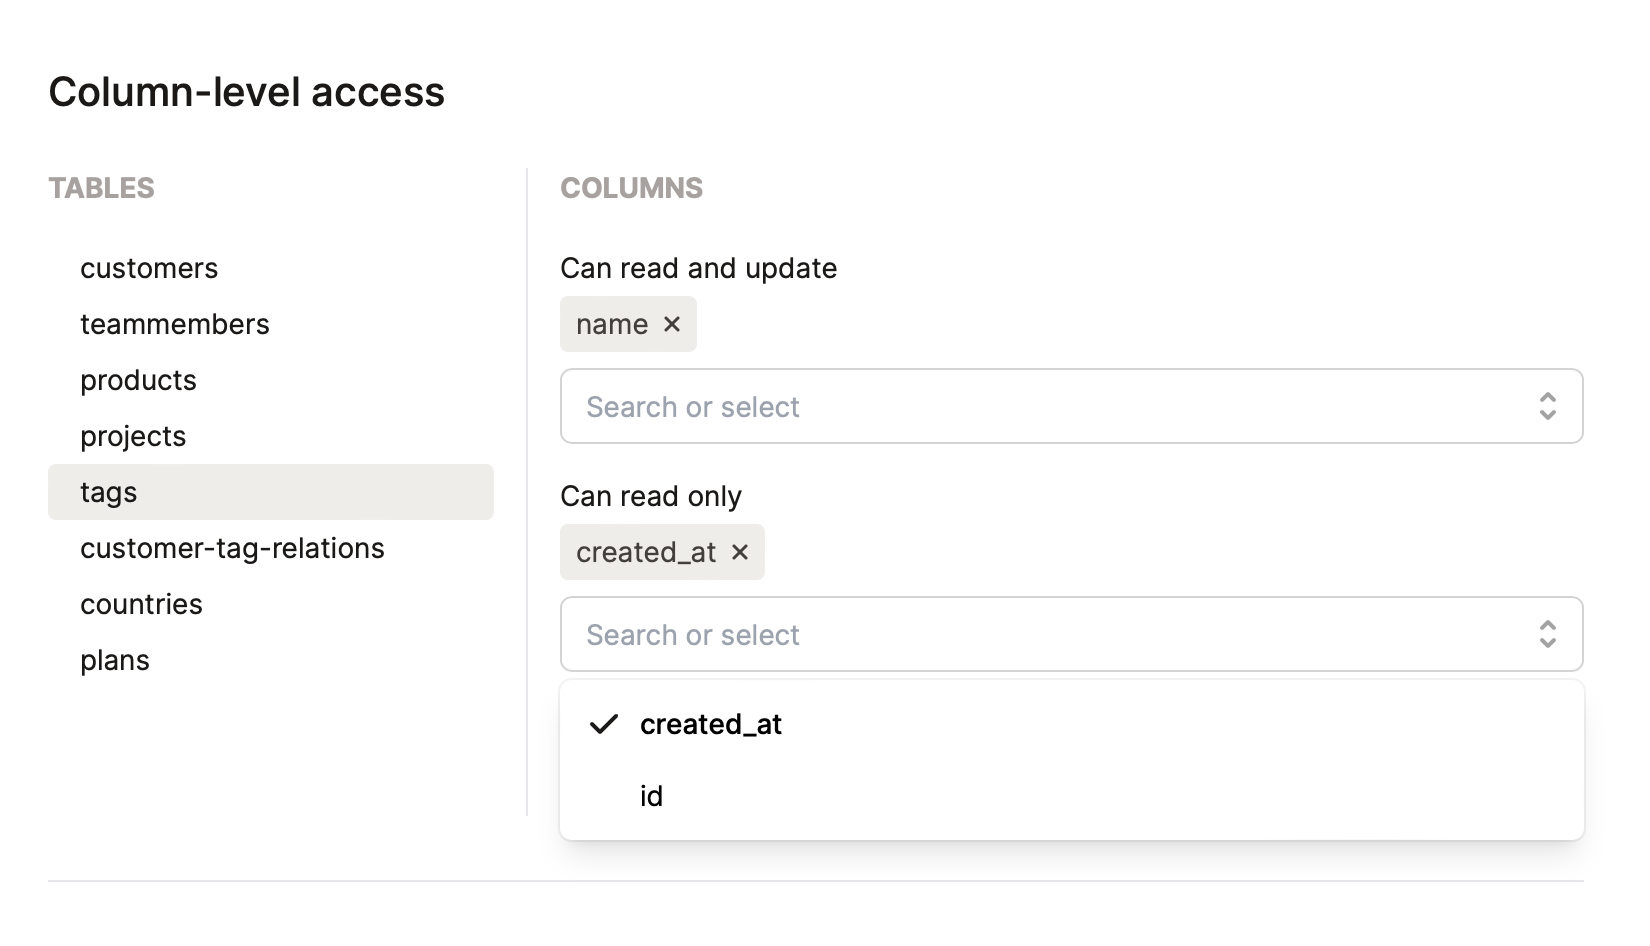
On the paid Dashibase plan, after you connect your database to Dashibase, you can restrict data access to your database via a GUI (no SQL). You can control what data your team members in your organization can see and edit via the dashboards in your organization, on both the table level:
... and the column level:
If you have any questions about this, feel free to reach out at sk@dashibase.com or ping us in our Discord.