
Product/October 31, 2022
Introducing Plugin Block: Add Your Code to Power Up Your Dashboards

Alfred Lua
Co-founder
When we gave demos of Dashibase to developers, most of them were impressed by how quickly they can set up a CRUD dashboard for their database. Our Notion-like UI makes building fast and all without SQL or JavaScript. “But…”
There’s always a “but.”
“But can I add my code? I don’t want to be limited by no-code tools when I know I can do something with code. I might not need to add my code now but I know I will want to someday.”
Well, the answer today is: Yes!
From today on, you can develop custom plugins with your favorite web framework in your favorite IDE to power up your dashboard.
(If you are eager to get started, feel free to explore our documentation right away.)
Dashibase’s new Plugin block
The new Plugin block is essentially an iframe of your plugin app, which you can add to the single-item view in your dashboard.
Here’s a quick example to help you understand the new Plugin block:
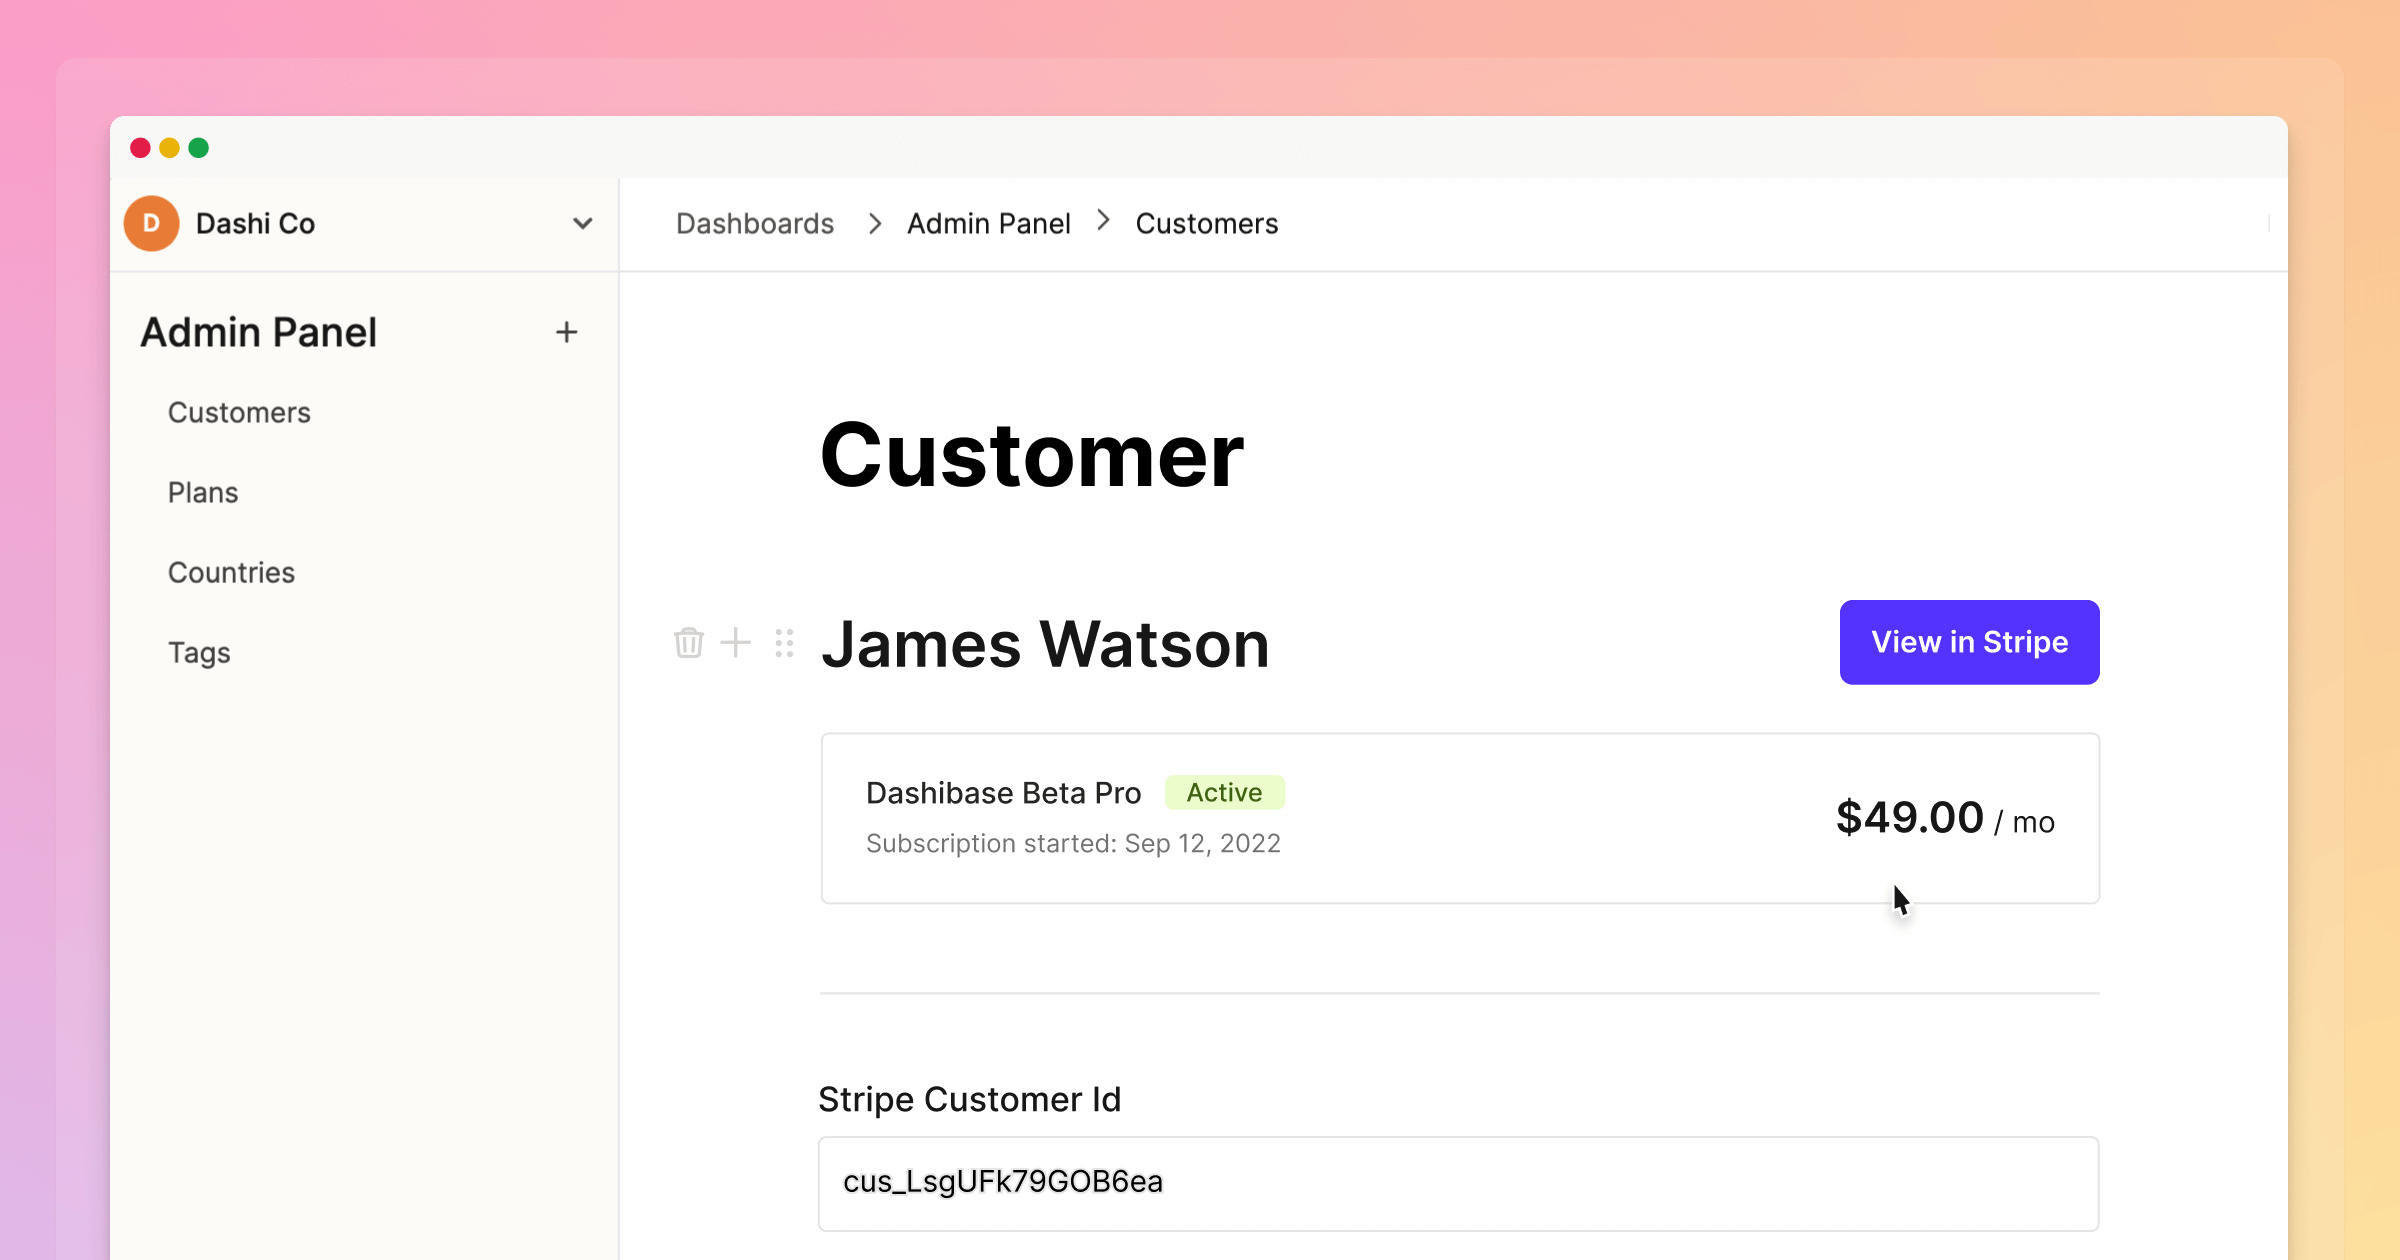
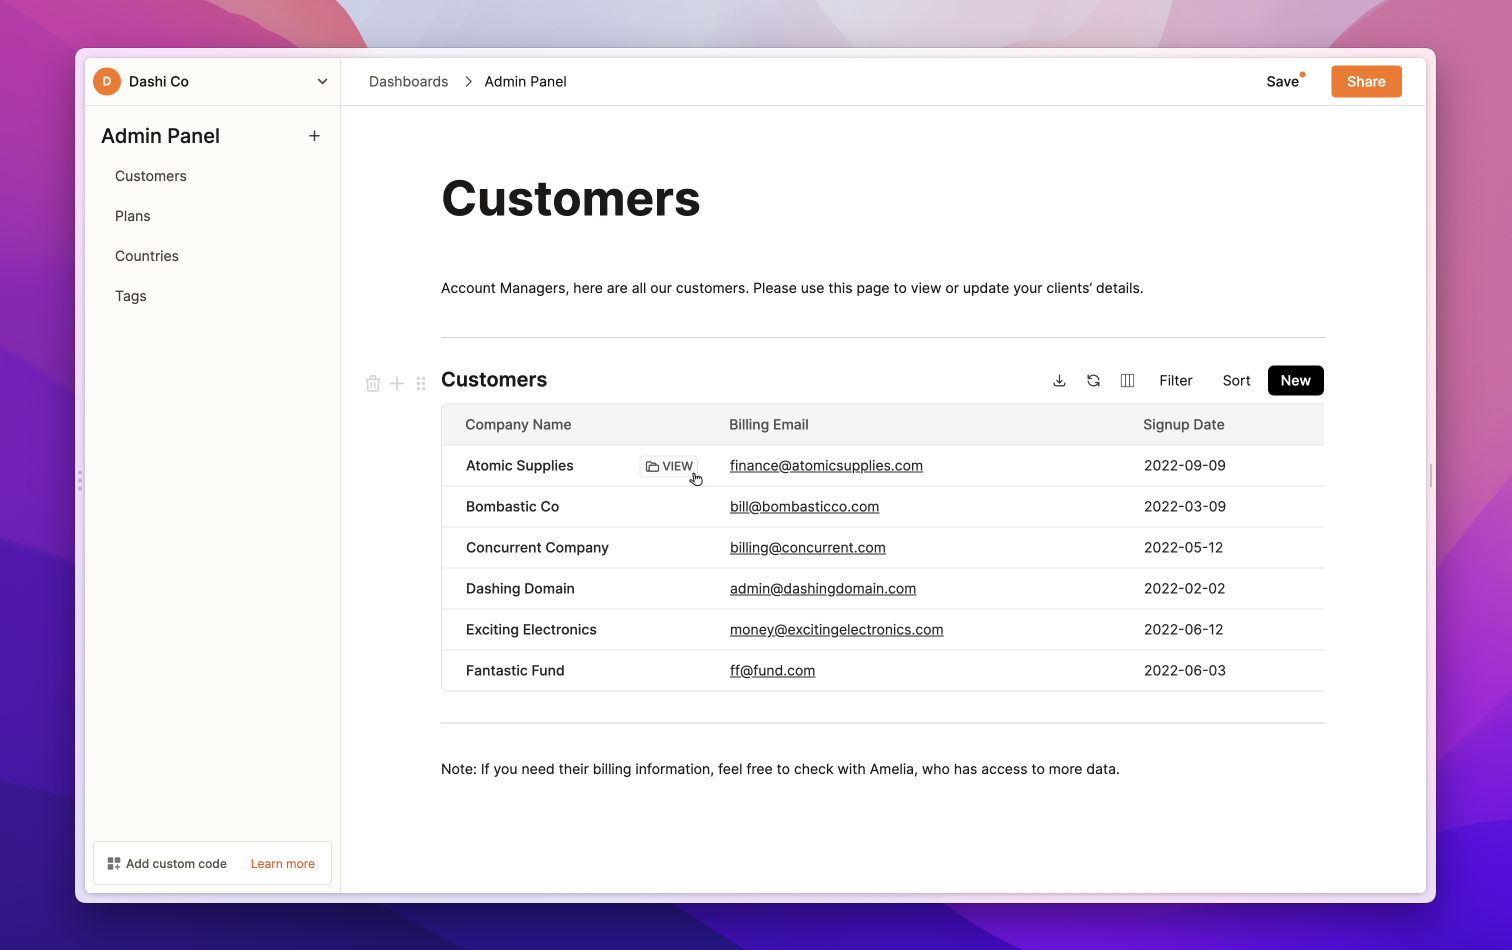
Say, you have a Dashibase dashboard to manage your customers’ information. And you want to see their Stripe subscription information in your dashboard.
- First, you should have stored your customers’ Stripe customer IDs in your database.
- Second, you can develop a plugin app that takes in a Stripe customer ID and returns the relevant Stripe subscription information.
When you have developed the Stripe plugin, to add the Stripe plugin to your dashboard:
1. Go to your dashboard and click on a customer
2. Type ‘/plugin’ and add the Plugin block

3. Enter your Stripe plugin URL
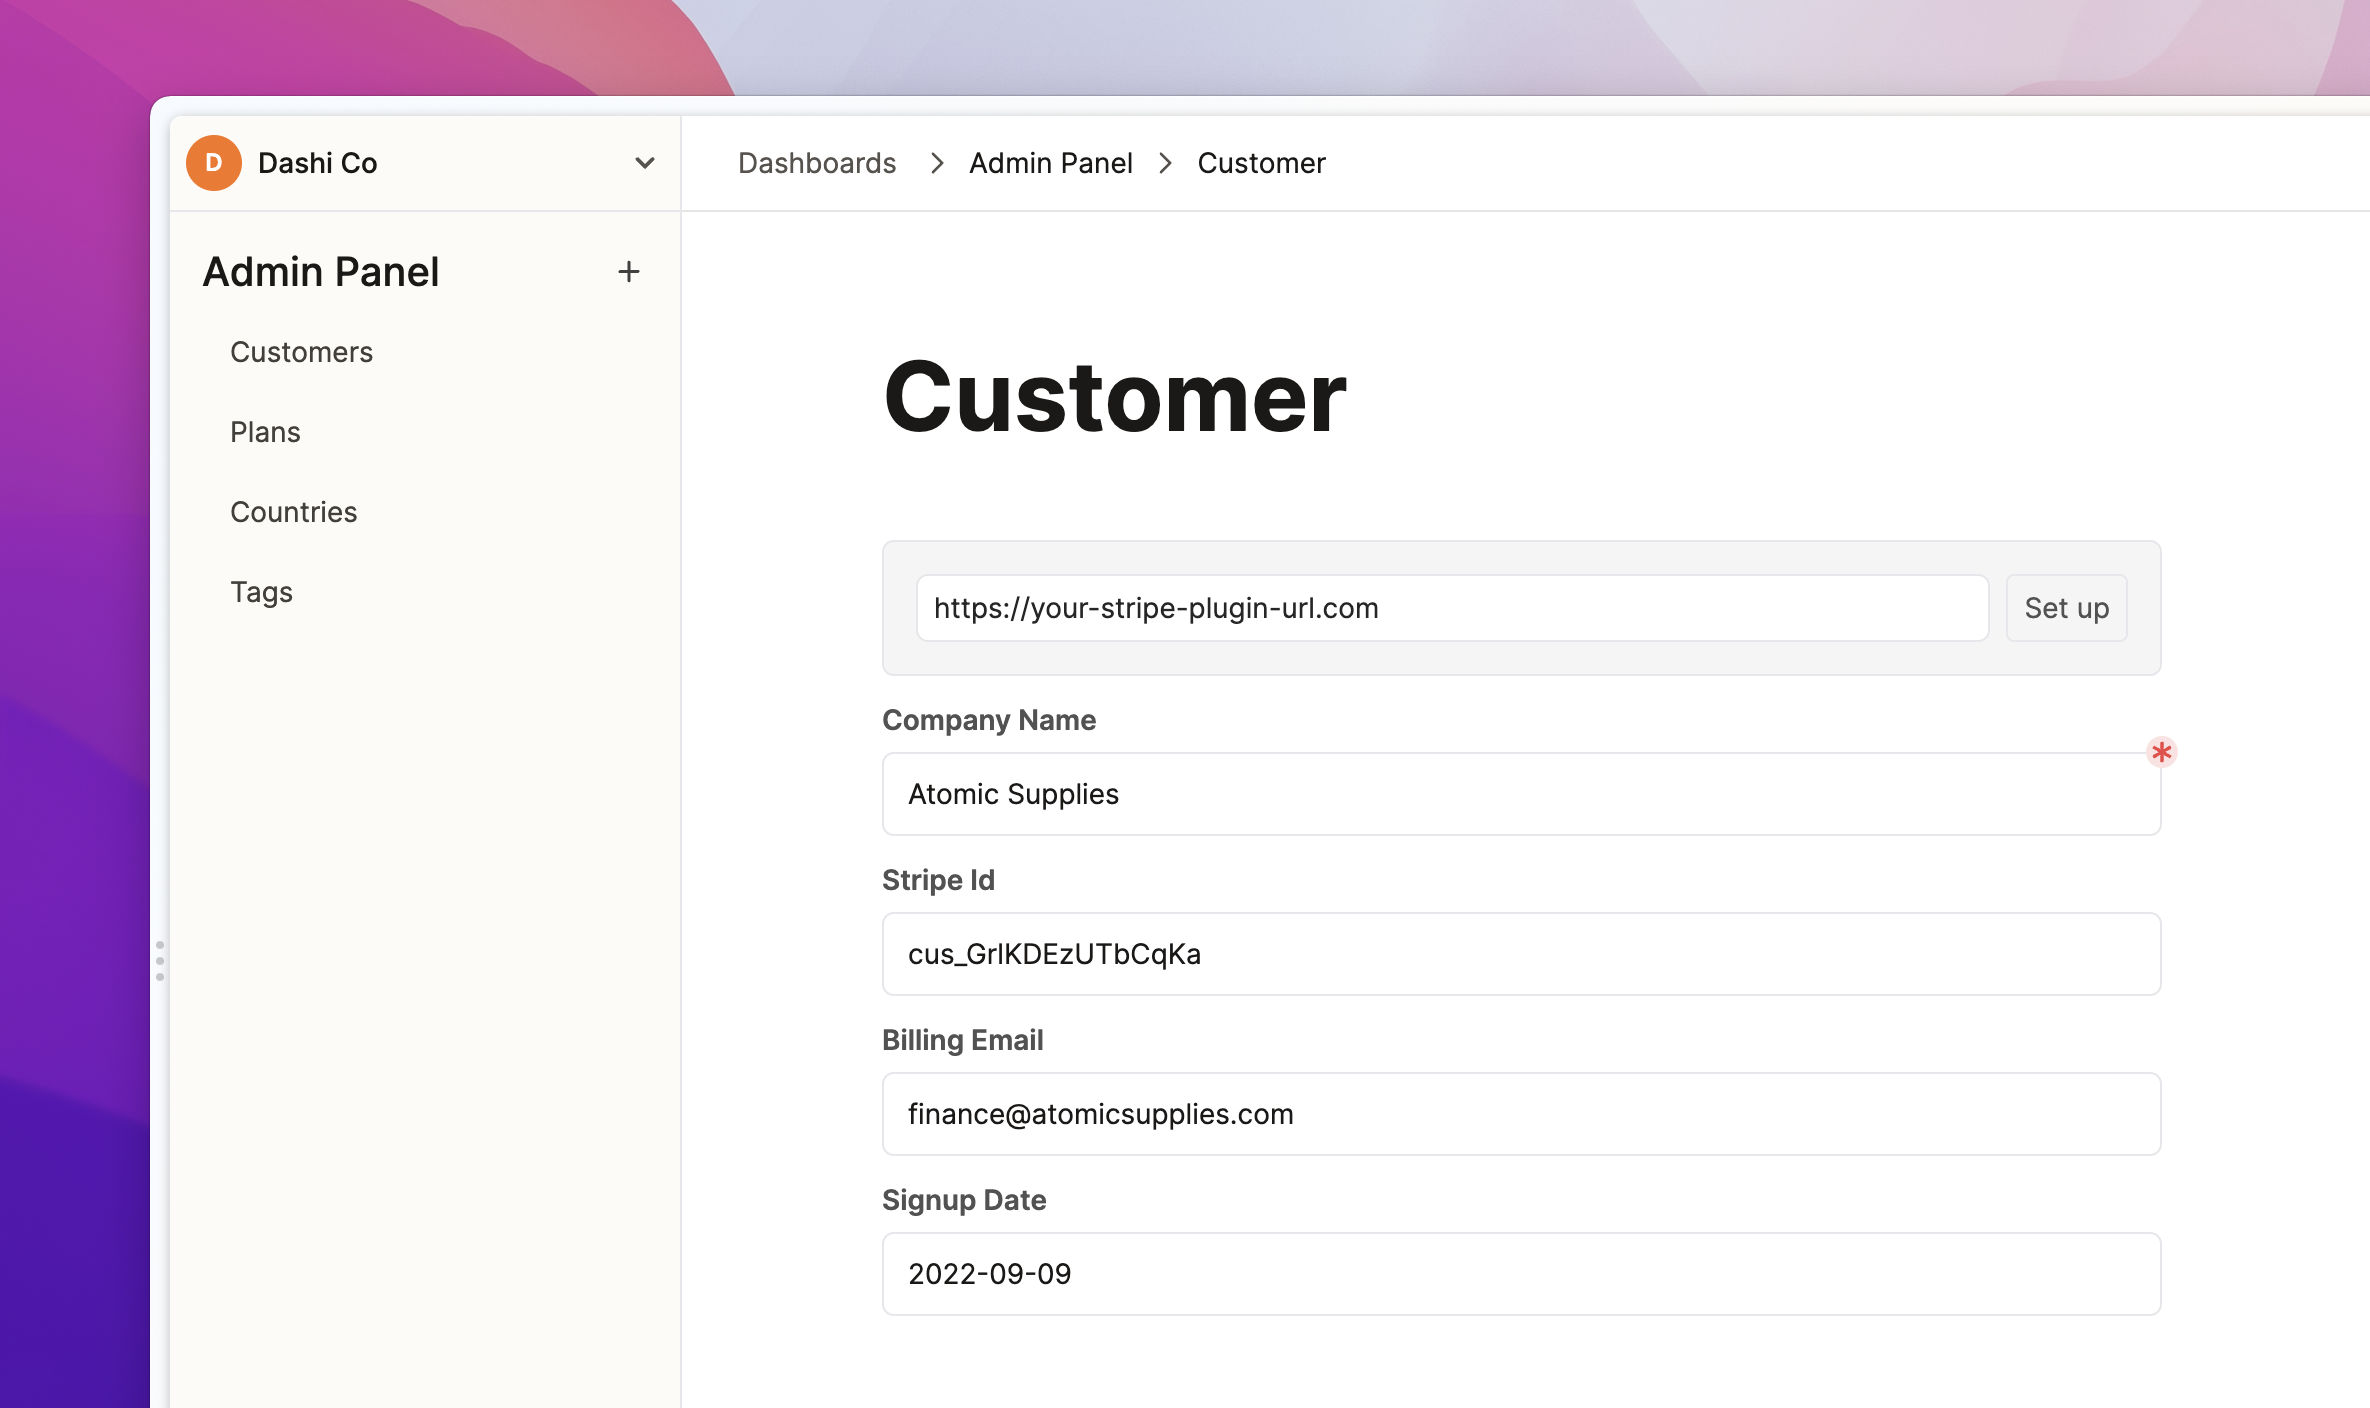
After you have entered your Stripe plugin URL, Dashibase will send a setup message to your Stripe plugin, informing it of the available columns in this table so that you can state what information you want from your dashboard (in this case, the Stripe customer ID).
4. Set up your Stripe plugin
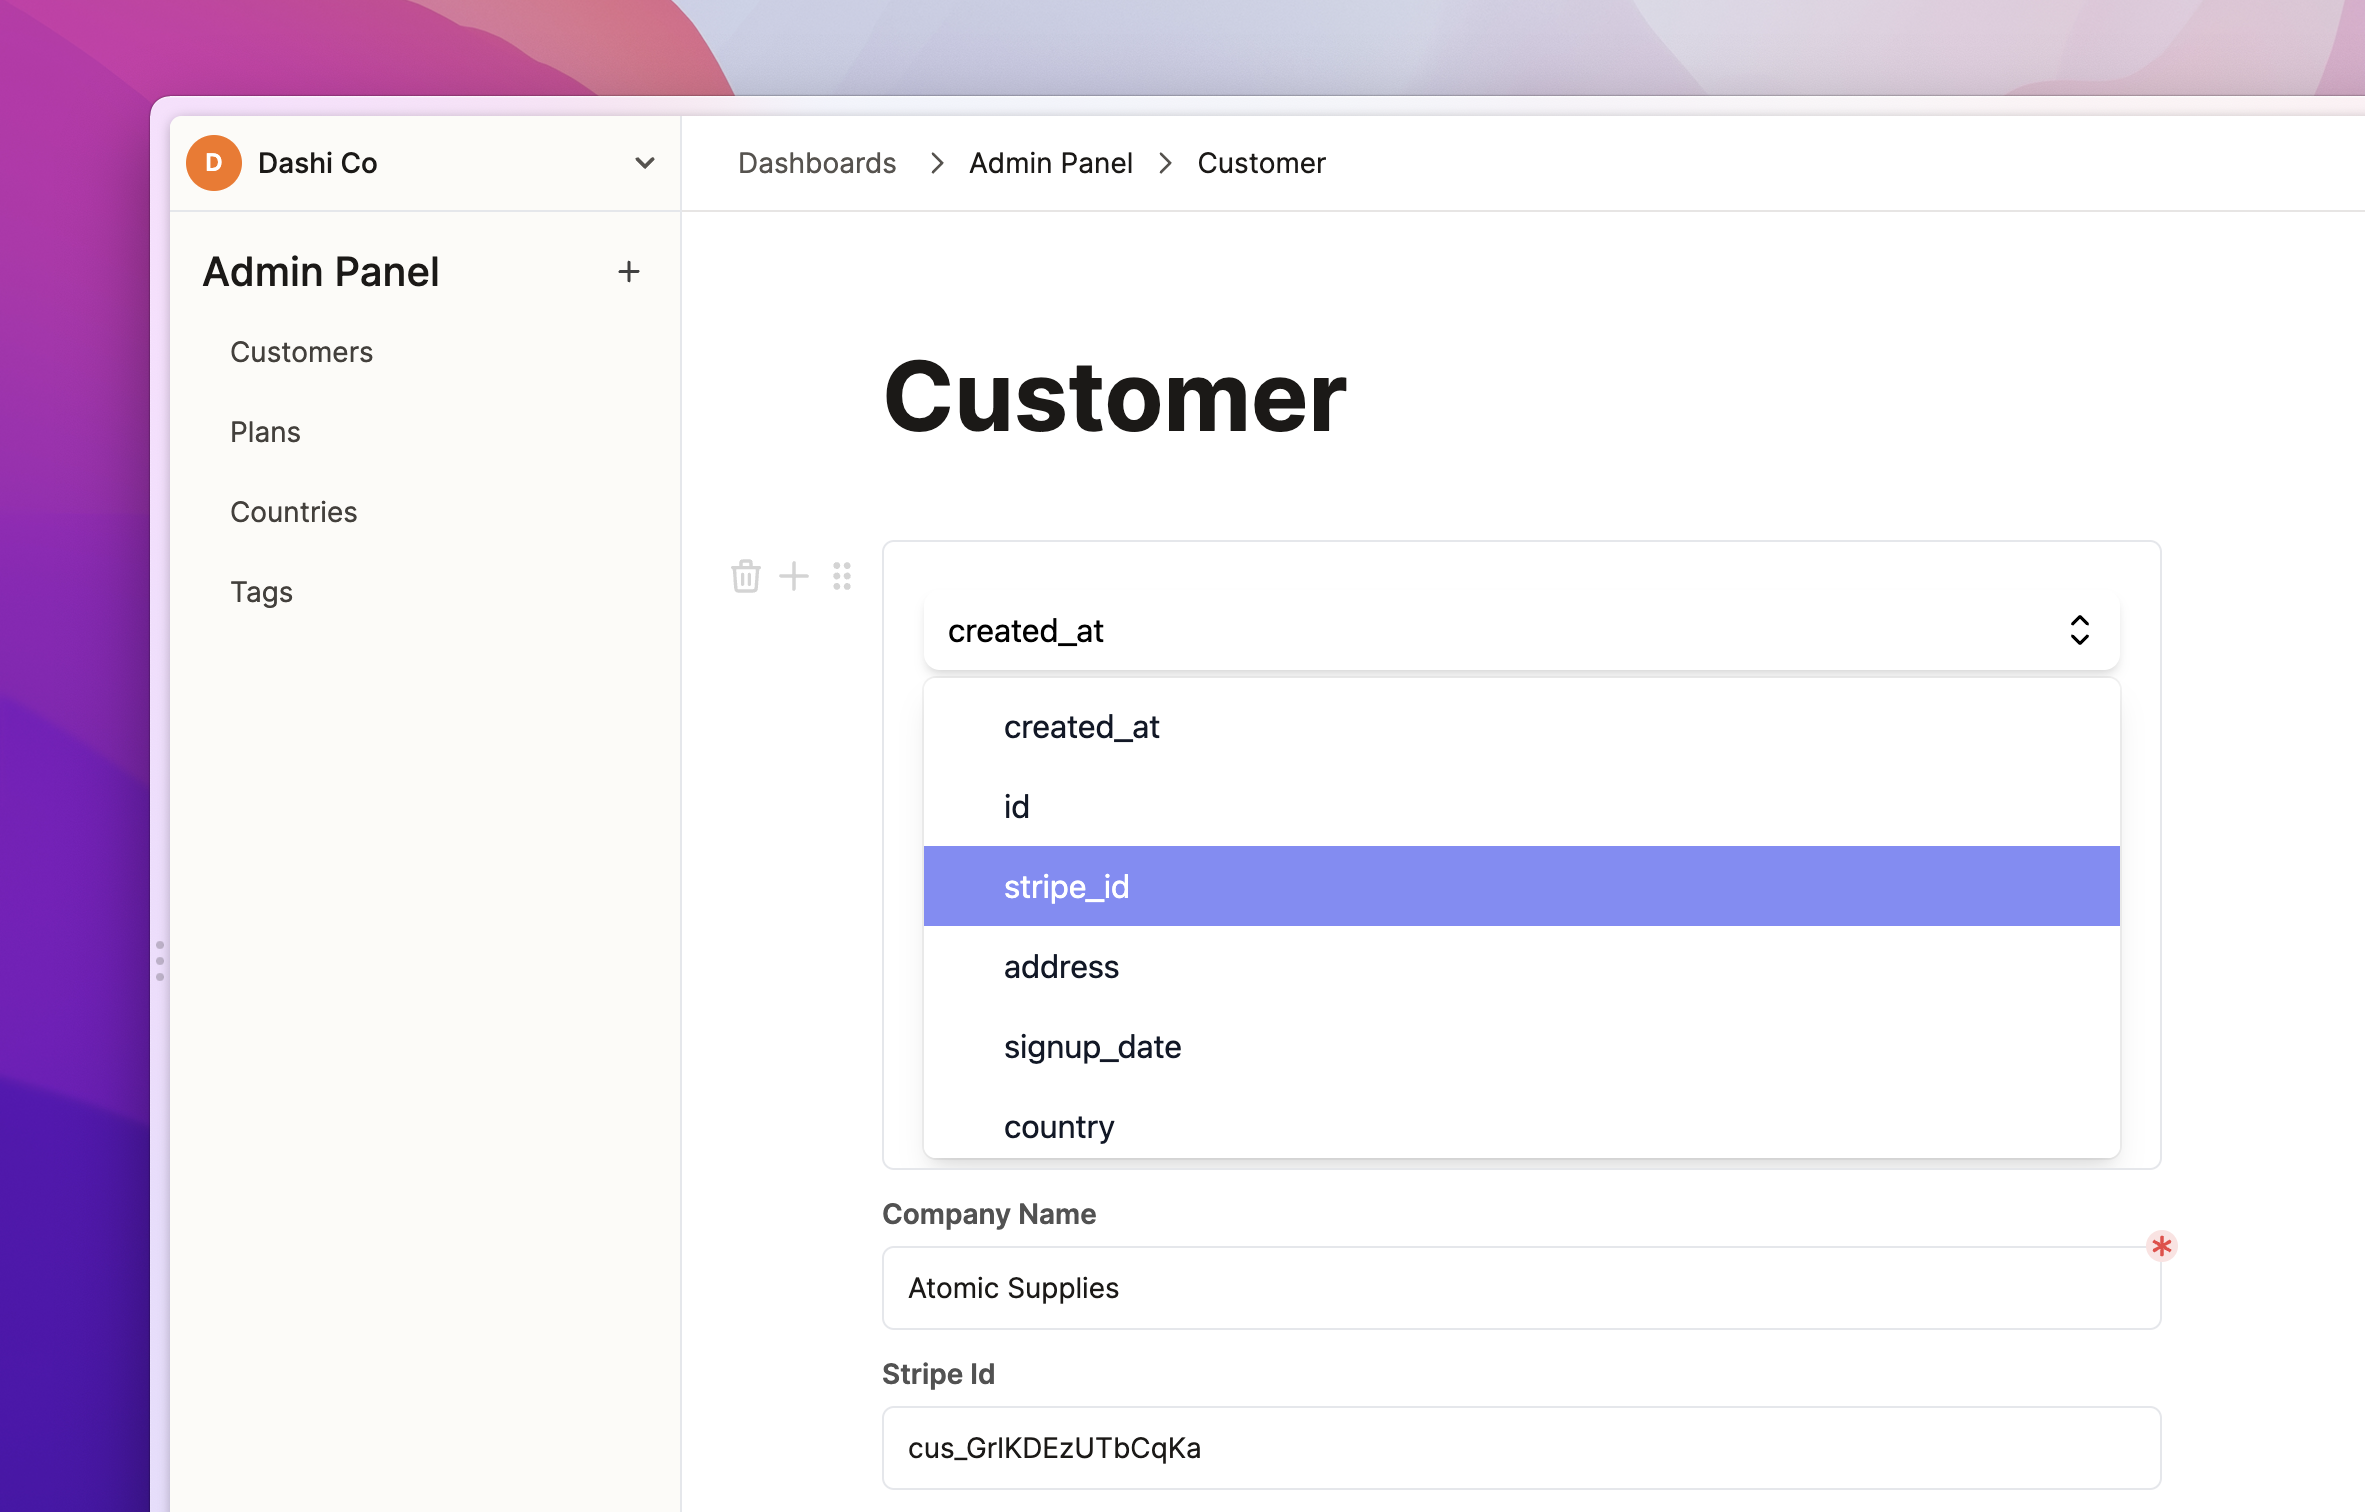
Your Stripe plugin would need the Stripe customer ID of each customer to return their respective Stripe subscription information. So, select the column that stores the Stripe customer ID.
5. Get the Stripe information for all customers
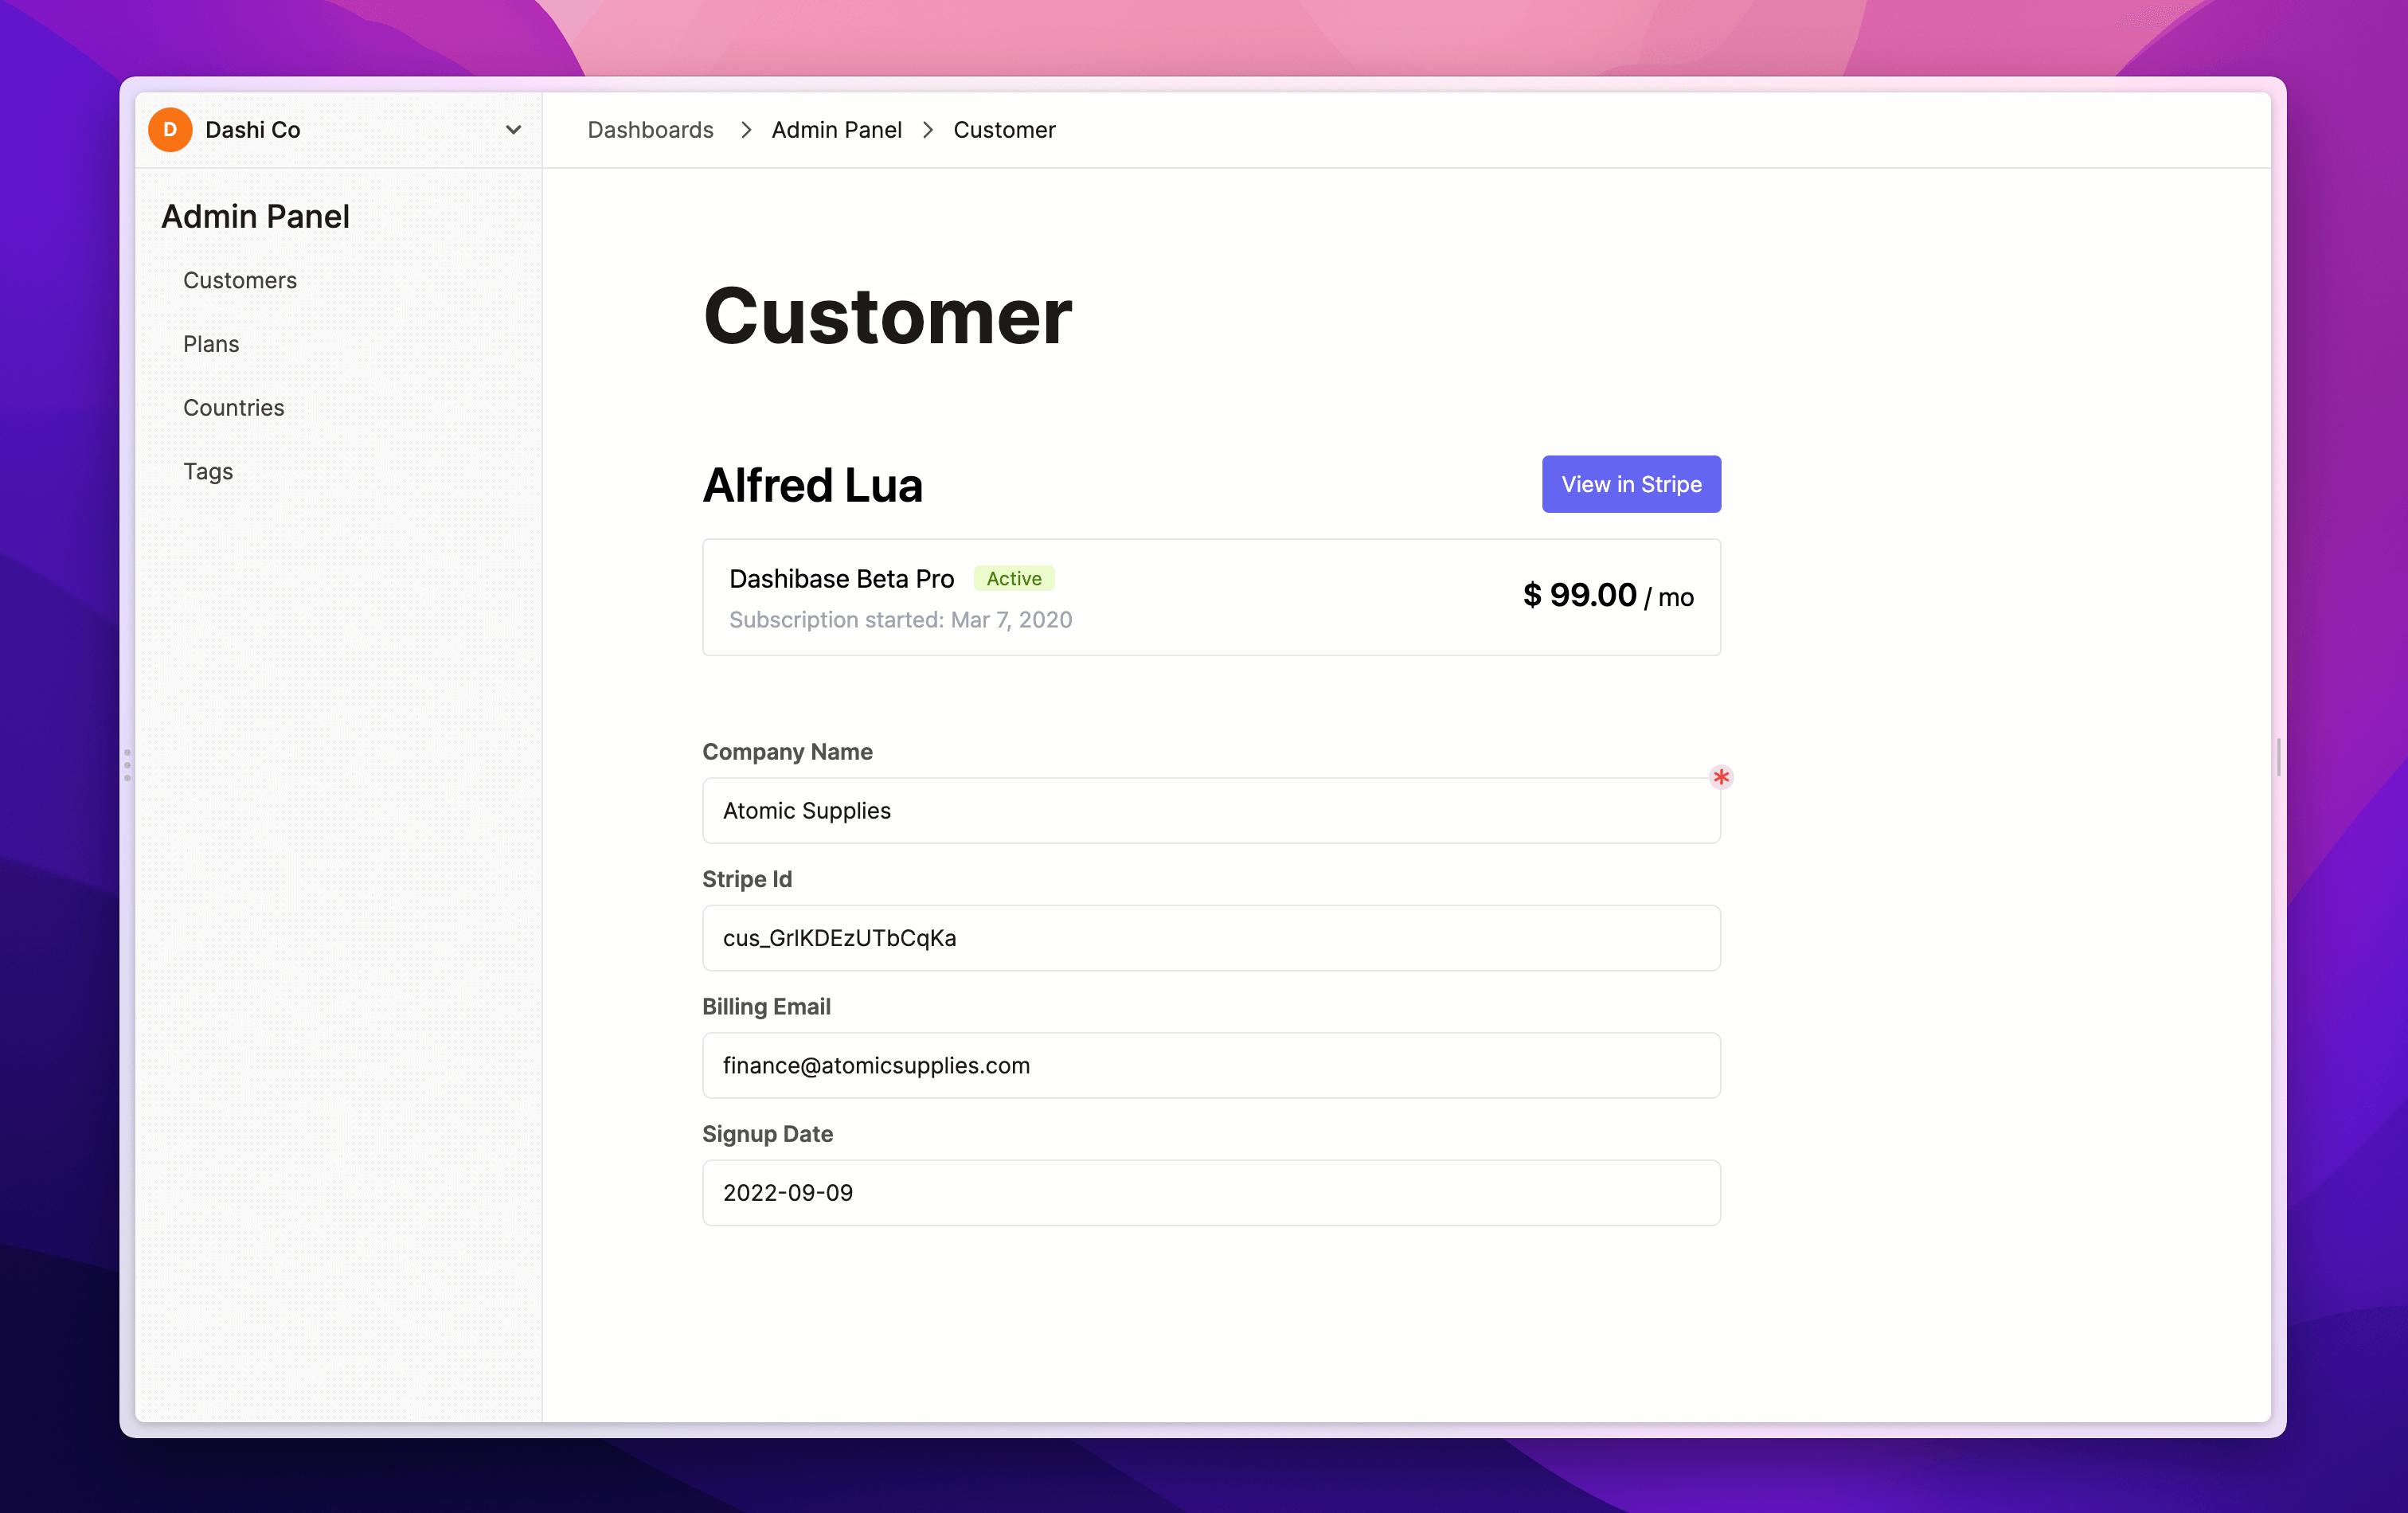
Once you have set up your Stripe plugin in a single customer view, it will be added to every customer’s page and updated with the respective Stripe information.
Now, every customer page that you view would have their Stripe information!
6 plugin ideas to power up your dashboards
There are many different ways you can use a plugin to power up your dashboards. Essentially, Dashibase sends your selected data to your custom plugin, which can then be used with third-party integrations or run custom actions like refunds or emails.
Here are a few to get your creative juice flowing:
1. Display customer information
As mentioned above, you could fetch your customers’ Stripe customer ID and display their subscription information. Similarly, you could display their contact information from HubSpot, their support tickets from Zendesk, or their profile activity from Mixpanel.
As long as you store their respective user ID in your database, you can use a plugin to fetch and display the relevant information from the respective apps.
2. Enrich customer data
You could use tools like Clearbit or ZoomInfo to find out more about each customer via their email address in your database. For example, you could fetch your customers’ personal email address from your database and enrich their profile with their business email address, LinkedIn profile, location, and more.
3. Send emails
Maybe you want to send emails to specific customers from within your Dashibase dashboard. You could develop a plugin that allows you to type a message and send an email via an email service provider (e.g. SendGrid). Dashibase would pass you the customer’s email address to be used in your plugin.
4. Generate invoices
If you regularly need to send invoices to your clients, you could develop a plugin that generates PDF invoices or even sends the invoices to your clients directly. Dashibase would pass the plugin the clients’ postal address, email address, and maybe a JSON of the order.
5. Refund transactions
If your customer support or ops team needs to frequently refund transactions, you could develop a plugin using the Stripe or Paddle API to issue a refund with one click. Dashibase would pass the plugin the Stripe/Paddle customer ID, and you could create a button that refunds the latest transaction for that particular Stripe/Paddle customer ID.
6. Generate images and articles with AI
Going wild here… if you are using Dashibase to manage your content, you could develop a plugin that generates images or articles via a tool like Stable Diffusion or GPT-3. The plugin would take in the content’s title or description and use it as a prompt. You hit “Generate” and store the output to your database, via Dashibase.
Let’s build
We are excited to see what plugins you will build and how you will use the new Plugin block.
To get started, check out our documentation, which includes:
- API documentation
- 3 plugin tutorials
- 3 sample repos
If you have any questions, feel free to ping us in Discord or email us at sk@dashibase.com.