
Plugins
Hello World Plugin: Next.js
You can now develop custom plugins to extend the functionality of your Dashibase dashboards. For example, you could display each customer's Stripe information, show support tickets from Zendesk, send emails via SendGrid, and more.
By the end of this tutorial, you will have a Hello World plugin that you can test in your Dashibase dashboard. You can follow along via our accompanying GitHub repository for this tutorial.
0. Set up
Sign up for a free Dashibase account, connect your database, and create a dashboard.
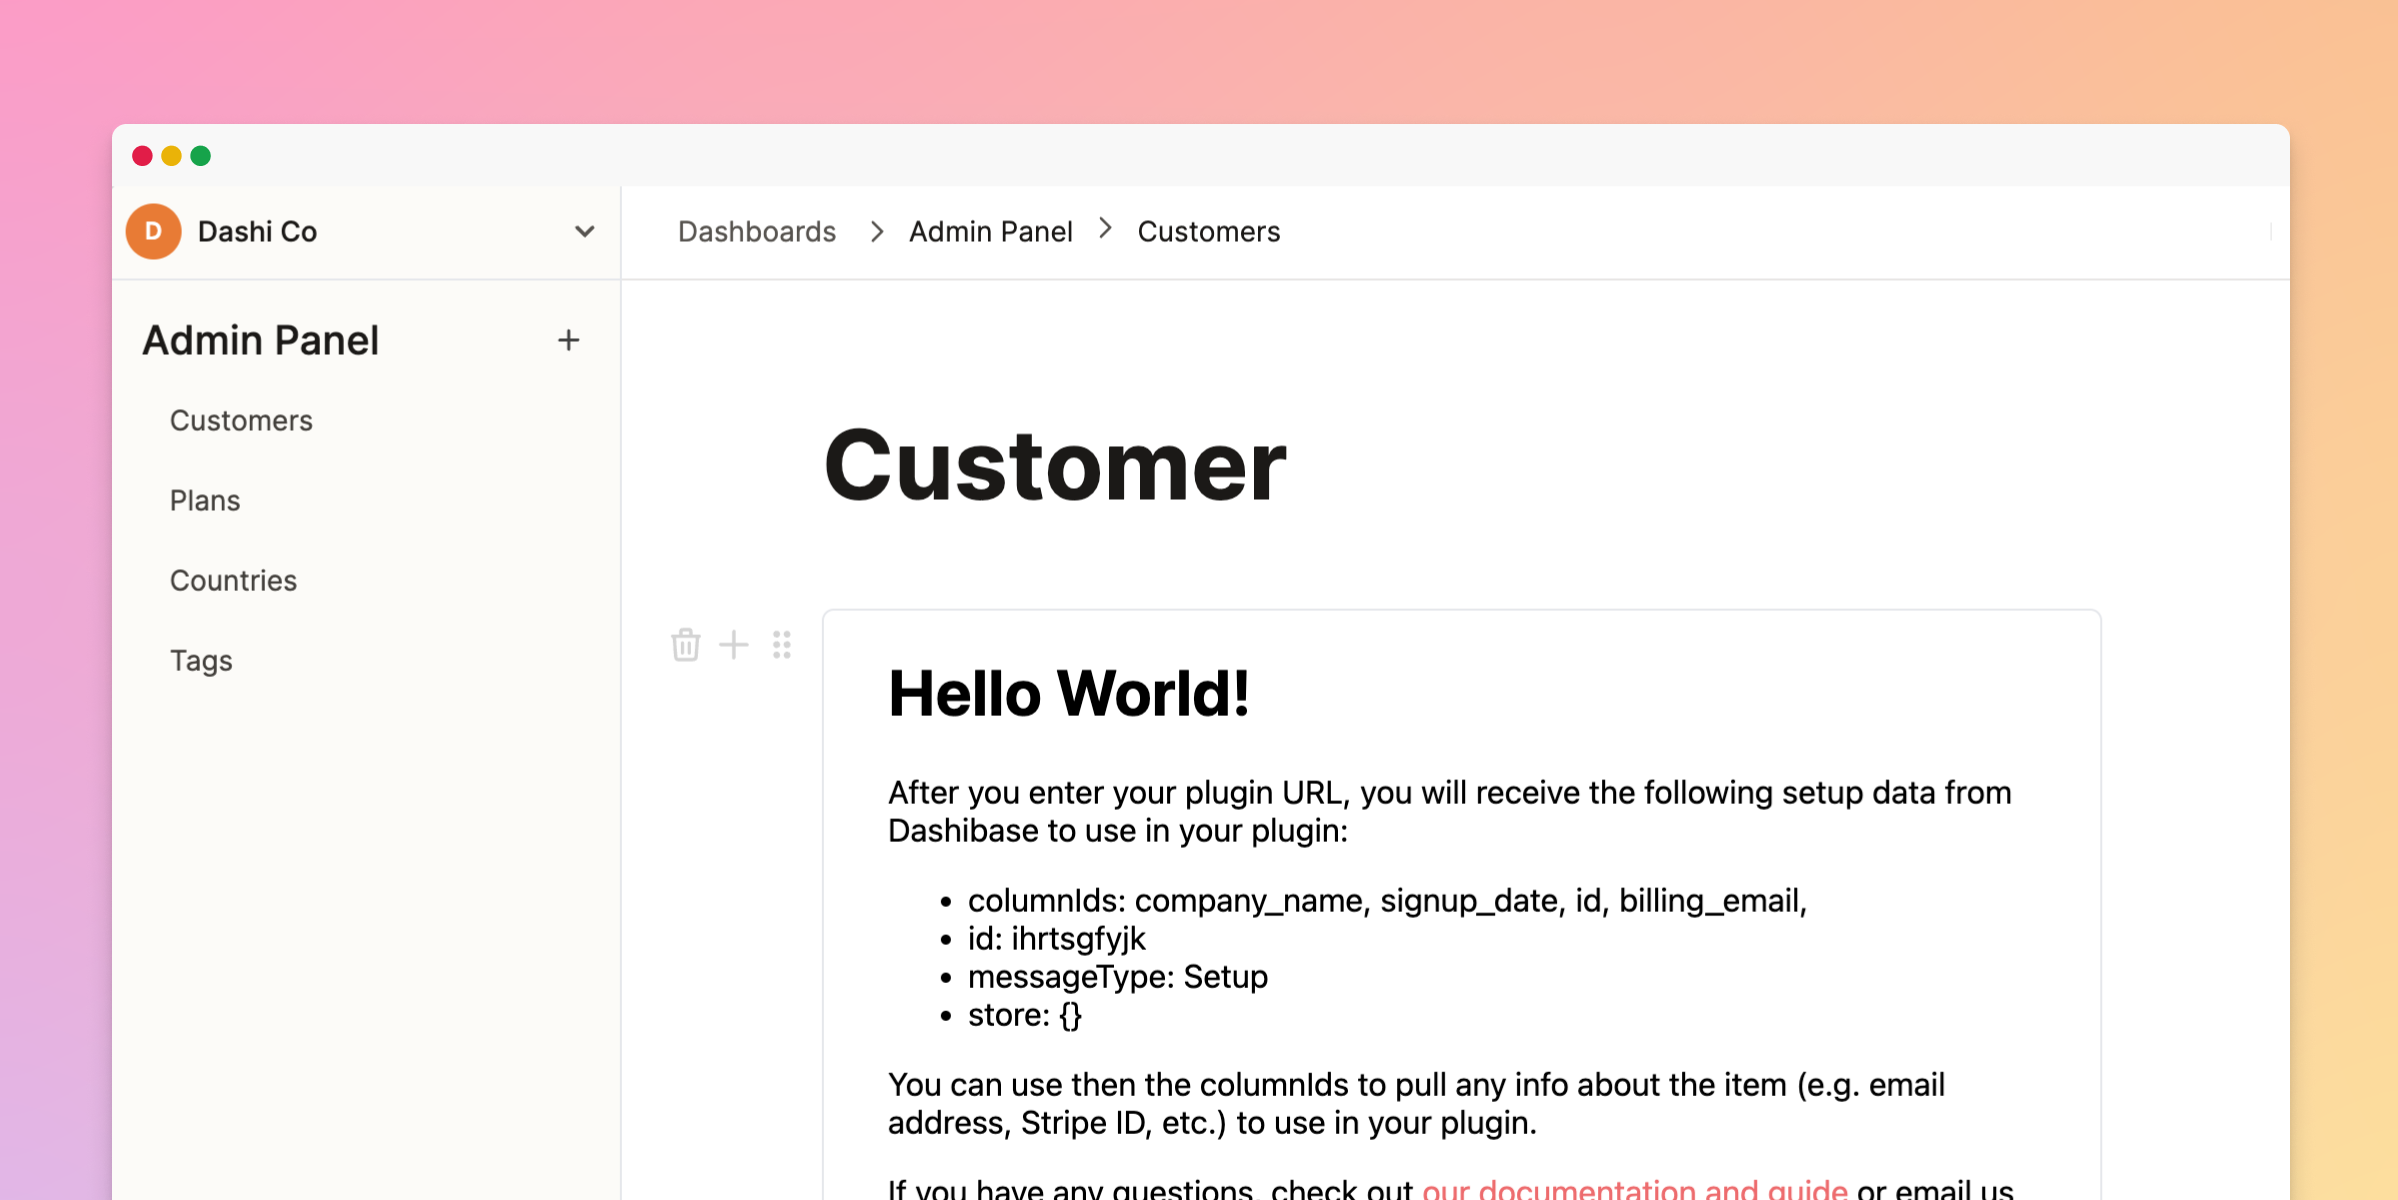
Let's assume you already have a dashboard set up in your Dashibase account. It is an admin panel for managing your customers. In there, you have a page where you have a table of your customers. For each customer, you have their company name, signup date, id, and billing email.
This information will be passed to the Hello World plugin, as we will see below.
1. Create a Next.js app
To create a Next.js app, run:
npx create-next-app@latest hello-world-plugin
cd hello-world-plugin
Another option is to create a new project via Vercel and clone the repo onto your computer.
2. Import and initialize PluginClient
Plugin Client is the API that the plugin will use to communicate with Dashibase. To install the @dashibase/plugin-client package, run:
npm install @dashibase/plugin-clientBecause the Plugin Client uses variables that are only available on the client side, we will need to dynamically import the package:
import { useEffect } from 'react'export default function Home() { async function importClient() { const PluginClient = (await import('@dashibase/plugin-client')).default const client = new PluginClient() client.onSetup((data) => { // Prints a log when a SETUP message is received console.log(`Received SETUP message ${JSON.stringify(data)}`) // Do something else }) // Inform Dashibase that plugin is ready to be setup client.init() } useEffect(() => { importClient() }, []) return ( <div>Hello World!</div> )}3. Display setup data
We technically have a plugin that displays "Hello World" already. But let's display the setup data that Dashibase passes to the plugin so that we know what information we could use in our plugin.
First, we will store the setup data in a setupData state variable:
import { useEffect, useState } from 'react'export default function Home() { const [setupData, setSetupData] = useState() async function importClient() { const PluginClient = (await import('@dashibase/plugin-client')).default const client = new PluginClient() client.onSetup((data) => { // Prints a log when a SETUP message is received console.log(`Received SETUP message ${JSON.stringify(data)}`) setSetupData(data) }) // Inform Dashibase that plugin is ready to be setup client.init() } useEffect(() => { importClient() }, []) return ( <div>Hello World!</div> )}Then, display the data:
import { useEffect, useState } from 'react'export default function Home() { const [setupData, setSetupData] = useState() async function importClient() { const PluginClient = (await import('@dashibase/plugin-client')).default const client = new PluginClient() client.onSetup((data) => { // Prints a log when a SETUP message is received console.log(`Received SETUP message ${JSON.stringify(data)}`) setSetupData(data) }) // Inform Dashibase that plugin is ready to be setup client.init() } useEffect(() => { importClient() }, []) return ( <div> <div>Hello World!</div> <pre>{ JSON.stringify(setupData, null, 2) }</pre> </div> )}If you want, you can style the app or display the data differently. You can see our example on GitHub.
You could check this out on your browser locally (http://localhost:3000/) by running:
npm run devBut you will not see the setup data because the plugin isn't used in Dashibase and hence isn't receiving anything from Dashibase. To see the full results, deploy your Hello World plugin (via Vercel or your favorite service provider) and test it in your Dashibase dashboard.
4. Test your plugin
Go to your Dashibase dashboard and open an item on a table. Add a Plugin block by typing '/plugin'.

Then paste your Hello World plugin URL and click "Set up".
You should see something like this. The columnIds will be different because your table likely have different columns from mine.
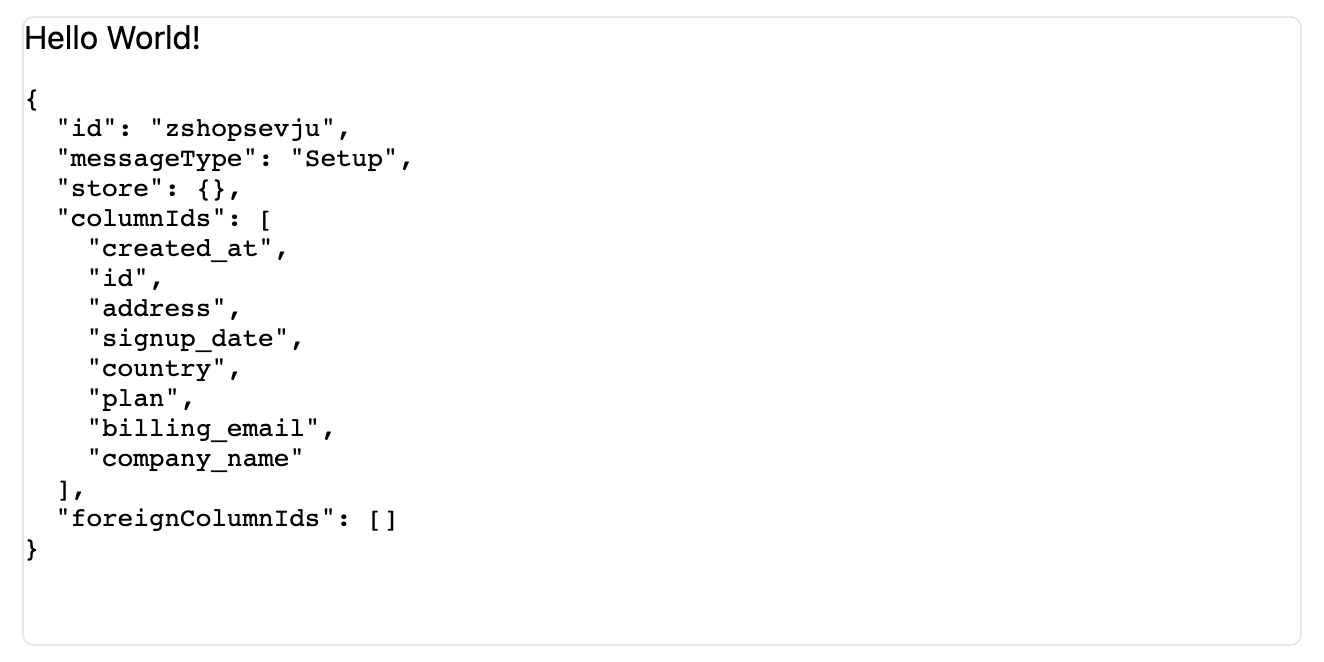
When you are developing your plugin, you can fetch the data from the columns (e.g. the customer's email) to display or use in your plugin.
Congratulations! You have your Hello World plugin!
You can find the full code for this tutorial in our accompanying GitHub repository.
Next steps
- Explore our Stripe plugin (tutorial, repo)
- Check out our Plugin Client documentation
- Build your own plugin!